Friday, December 2, 2016

Bread!

Right now I am busy making breads for tomorrows show at Normandy High School.  So far I have finished making my Onion Bread and Garlic Herb Rolls, I am working on the Garlic Herb Braided Bread, next will be my White & Whole Wheat Swirl Bread and finally Cinnamon Raisin Bread.


So if you are craving some pasta or fresh baked breads, come and see us at:
Normandy High School PTA Holiday Arts & Crafts Fair
2500 West Pleasant Valley Road, Parma, Ohio 44134
Saturday December 3, 2016
10:00am - 4:00pm


Friday, November 25, 2016

Happy Thanksgiving 2016

Happy Thanksgiving!
I hope everyone had a very, very wonderful Thanksgiving!

Thanksgiving is my favorite holiday, I get to cook up a variety of veggies that I grew through out the year.  I do not have to do any special Thanksgiving shopping.  Everything that I cook is either something that I grew or just the basics that I always have in the house (such as flour, milk, butter).

Here are some pictures from our Thanksgiving.
From everyone at Real Veggies Farm!
~~~~~~~~~~~~~~~~~~~~~~~~~~~~~~~~~~~~~~~

Macaroni Salad 
(made with my macaroni pasta and spinach pasta shells)
 

Creamy Cheesy Winter Squash
 

Onion Bread Stuffing
(made with my onion bread)
 

Garlic Bread Stuffing
(made with my garlic bread)


 Gravy
(made from the turkey drippings)


Mashed Potatoes and Turnips


Cream Cheese Corn


Spaghetti Squash


Green Beans with Bread Crumbs


Turnips, Radishes, and Cabbage


Canned Beets
(made by Franks mom)


 Last but not least, the highlight of the dinner.....
our Thanksgiving Turkey!

This year I got the best turkey I have ever had!  
I got this years turkey from Fair View Meadow Farm, in Wellington, Ohio.
They raise pastured, dark-colored turkeys, which have a similar coloring to a wild turkey.
It was a very juicy turkey with a different, very very good, taste.  I can not explain the way it tasted, but it had an exceptional flavor, so much better than any other turkey I have had.


Pear Butter Pumpkin Pie, Buttermilk Pie, and Three Pumpkin Pies

Monday, October 31, 2016

Garlic Planting

Over the past two weeks I have been working on planting all my garlic for next year.  I still have a little more to get in but most my garlic is now in the ground.

Compost and manure spread over my garlic area, before I tilled and started planting the garlic.


Tilled and ready for garlic to go in the ground.
 

Day 1 of garlic planting.
 

Day 2 of garlic planting.  
I was able to get in almost all of the garlic, I still have a little bit of garlic to get in at the ends of the rows. 


I am hoping to be able to get in the rest of my garlic this week.  I would have been planting garlic today, if it wasn't for all the rain that we got on Sunday, the ground is a little too wet right now to be able to plant garlic.

Tuesday, October 11, 2016

Brunswick Heritage Farm - Fall Foliage Pictures


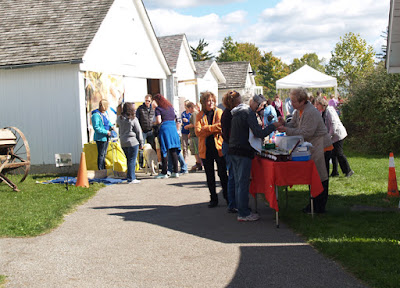
 Our tables at the Brunswick Heritage Farm for the Fall Foliage Tour.


The Hospital Tent


The kids got a chance to make their own candles over a fire and a demonstration for how to make soap over a fire.


Our Tables


Hayrides were available throughout the day.

~~~~~~~~~~~~~~~~~~~~~~~~~~~~~~~~~~~~~~~~~~~~~~~~~~~~~~~~~

Brunswick Pumpkin Festival
If you missed the fun this past weekend, you can still come down to Brunswick Heritage Farm this coming weekend, for the Pumpkin Festival Saturday, October 15 and Sunday, October 16 from 10am to 5pm.  There will be over a hundred vendors, hayrides, free face painting and other fun things for the kids.  There will also be food trucks, for when you get hungry.  Some of the vendors will be bringing their animals along with them, for everyone to enjoy.  There is going to be lots and lots of pumpkins to pick from, and much more!  So do not miss the fun!

Saturday, October 8, 2016

Fall Foliage Tour at Brunswick Heritage Farm

Today and tomorrow Brunswick Heritage Farm is going to be a stop on the Fall Foliage Tour.  We will be down at the Heritage Farm on Sunday (November 9th, from Noon - 6:00pm).  We will be bringing lot of goodies to sell including, Onion Bread, Garlic Herb Braided Bread, Garlic Herb Rolls, Victorian Milk Bread, Pizzelles, Chocolate Pizzelles, Pumpkin Pizzelles, Lots of Pasta, Vegetables (tomatoes, hot peppers, mustard greens, radishes, kale, scallions, basil, okra), Cat Grass, Broom Corn, and More!  I will also be demonstrating how to make pasta the old fashion way through out the day.

So if you want to get out tomorrow and have some fun, come on down to the Brunswick Heritage Farm.  Do some shopping, take a tour, and watch some demonstrations.  They will also have fun educational activities going on for the kids.

Friday, July 1, 2016

The Start of Garlic Harvesting!

Today I dug a little bit of garlic for this weekends markets.  I will be digging the rest of my garlic over the next couple weeks.  Fresh dug garlic is wonderful, since it has not yet been dried it will not store for long (unless you dry them), but it is the juiciest garlic you will ever taste!
 Romanian Red Garlic and Georgia Fire Garlic

And here are a few more pictures that I took from around the farm.
Tomatoes, Pole Beans, and Bush Beans


Thursday, June 16, 2016

Brunswick Farmers Market

This past Sunday was the start of the Brunswick Farmers Market.
Come and see us at the Brunswick Heritage Farm!
4613 Laurel Road, Brunswick, Ohio 44212
Sundays 11am - 2pm

We will have veggies, cut herbs, potted herb plants, potted vegetable plants, herb and vegetable hanging baskets, dahlia tubers, bread, pasta, and more!


Also do not forget to stop by the Valley City Farmers Market on Saturdays!

Friday, May 20, 2016

Pictures of What is Growing

I have not done a post in a while, since I have been so busy, so I figured I would post some pictures of what we have growing right now.  Unfortunately the weather this spring has not quite be cooperating with us.  It has been too cold, and I have not been able to get much in the ground since the soil has been staying wet.  It makes me feel really behind.  I was able to get my lettuce, spinach, carrots, onion sets, and a few other things in, all of which are looking pretty good.  I am hoping after this weekend to be able to get some major planting done, we will see how it goes.

A bunch of my plants under lights in my basement, mostly peppers, tomatoes, and a few herbs.

 My garlic growing out at the farm.

 Dahlias, some herbs, some tomatoes, and celery, in my hoophouse.

A couple pallets full of kohlrabi, cabbage, and kale, waiting for the ground to dry out so they can get planted.

The rest of my garlic at home.

Friday, April 22, 2016

Where We Will Be Selling

Just figured that I would let everyone know where we will be selling the next few months.  We are going to have probably 4 more shows coming up, and then in June we will be starting our farmers markets!


Upcoming Events:

Saturday, May 14, 2016 - Downtown Wadsworth Spring Craft & Herb Festival
Downtown Wadsworth, Ohio
9:00am- 4:00pm

Saturday, May 21, 2016 - Spring Craft Show, St. Mary's Polish National Catholic Church
5375 Broadview Road, Parma, Ohio 44134
10:00am- 4:00pm


Our Farmers Markets:
Valley City Farmers Market
Saturdays 9a.m. to 12p.m.
Starting again the First Saturday in June 2016
Can not wait to see everyone again in June!
Located at Liverpool Township Depot, 6615 Center Road
Valley City, Ohio

Brunswick Farmers Market
Sundays 11a.m. to 2p.m.
Starting again June 12th 2016
Can not wait to see everyone again in June!
Located at Brunswick Heritage Farm, 4613 Laurel Road
Brunswick, Ohio 44212

****We may also be attending a few events this year during the summer, and may be adding another farmers market during the week.  Check back at our Where We Sell Page for updates.****

Tuesday, April 5, 2016

Dividing Dahlia Tubers

Since I spend most of the day today dividing and potting up dahlia tubers, I figured I would do a post on how to divide up dahlia tubers, so here it is.

How to Divide Dahlia Tubers
I find it best to divide the dahlia tubers in the spring just before planting, at this time the eyes will be more visible than in the fall, making it much easier to divide, especially if you are a beginner.

Dividing the tubers is important, if you keep planting the tubers outside every year without dividing it will become a “root bound” mess. Just picture trying to grow a large plant in a little pot, when you remove it from the pot and look at the roots it becomes way to overcrowded and root bound. Dahlia tubers can do the same kind of thing. If you do not divide them the tubers can become very congested, and run out of room to grow.

When dividing the tubers you have to make sure that for every root you have an eye, if you just cut off the root it will not grow. For beginners it may be easier to just cut the clump in half or three pieces, until it becomes easier to tell where the eyes are and what they look like. Just be sure that every clump has at least one eye. This is what I did when I first started saving dahlia tubers, and slowly every year I was able to cut them up better and better, till finally I could divide the tubers up so almost every root has an eye.

Below: The first photo shows the some visible and still dormant eyes the second photo shows where you could cut in order to have an eye at least one eye for each tuber. The cuts from this photo would give you 4 separate tubers to plant.


Potting up Dahlias

So today I spent most of my day in my hoophouse dividing and potting up some of my dahlias.  I would say I probably got about 1/3 of them potted up.  I probably have 2 or 3 more days of potting up dahlias to go.  Unfortunately I will not be able to pot up anymore until I know that the weather will be a little warmer.  All the dahlias that I potted up today I have in my basement, due to the weather this week it just seems too risky to keep my dahlias out in my hoophouse, since I do not want them to rot or freeze.

The dahlias that I potted up today.

The plants that I currently have in my basement.


The dahlias that I potted up today are:  Kelvin Floodlight, Elks Jack Sparrow, Santa Claus, Mr. Optimist, Firebird, Hakayou, Patches, Black Satin, American Beauty, Magically Dun, Sky Angel, and a couple of other ones that I do not know what the names are.

I just can not wait for this

Thursday, March 10, 2016

Upcoming Events - March 12th & 13th 2016

Come See Us this Weekend for a Variety of Homemade Goodies!
pasta, jams, jellies, chocolates, bread, and gift baskets
 ~~~~~~~~~~~~~~~~~~~~~~~~~~~~~~~~~~~~~~~~~~~~~~~~~~~~~~~
Saturday, March 12, 2016 - Brunswick Kiwanis Club Spring Craft Show, Brunswick Rec Center, 3637 Center Road, Brunswick, Ohio 44212
10:00am- 3:00pm
 ~~~~~~~~~~~~~~~~~~~~~~~~~~~~~~~~~~~~~~~~~~~~~~~~~~~~~~~
Sunday, March 13, 2016 - Spring Shopping Extravaganza, Middleburg Heights Community Center,
16000 Bagley Road, Middleburg Heights, Ohio 44130
1:00pm- 4:00pm
  ~~~~~~~~~~~~~~~~~~~~~~~~~~~~~~~~~~~~~~~~~~~~~~~~~~~~~~~


Seed Starting Time!

Seed starting time is finally starting to get into full swing.  Yesterday I finally got around to starting my first round of hot pepper seeds.  In about a week I will be starting the next round of pepper seeds, those will be sweet peppers.  I can only start so many flats at a time because in order to get a good germination they need to be nice and warm.  As you can see in the below picture one of my seed starting racks I have covered in plastic, the plastic keeps the heat, that the lights give off, inside with my plants.  It can be between 15 and 20 degrees warmer inside the plastic than it is in the rest of my basement.


Whenever I start seeds I try to keep the newly planted, not yet sprouted flats on the top two shelves of my this stand, these are the warmest shelves, heat rises.  Once they sprout I can then move them down to the lower shelves.  After the seedling get a little bit larger I can then move them to one of the lights outside my plastic covered shelf.  Since I only have room to start 8 flats of seeds at a time I have to plant my seeds in rounds.

So yesterday I started 3 flats of hot peppers, one flat of rhubarb, and a flat of cabbage and kohlrabi.


A flat of mixed herbs (oregano, thyme, marjoram, peppermint, and some others) and a flat of celery, both were planted around 2 weeks ago.
 

Whenever I start some seeds I keep track of all important dates, and information.  Here is my clipboard where I write down the plant, if I started it inside or outside, date started, date sprouted, date transplanted inside, date transplanted outside, date harvested, and date finished.


Thursday, March 3, 2016

Our First Show of 2016!

This Saturday (March 5th) we will finally be attending our first show of 2016!  We should be attending a show almost every weekend until our markets start in June.  So check back here to see where else we will be selling in the upcoming months (just go to our WHERE WE SELL page).  Also during the summer we are thinking about selling a another one or two farmers markets, I will keep everyone updated with any new information.

Here are the craft shows that we will be attending this month:

Saturday, March 5, 2016 - Spring Craftacular, Our Savior's Rocky River Lutheran Church,
20300 Hilliard Blvd., Rocky River, Ohio
10:00am- 3:30pm
~~~~~~~~~~~~~~~~~~~~~~~~~~~~~~~~~~~~~~~~~~~~~~~~~~~~~~~
Saturday, March 12, 2016 - Brunswick Kiwanis Club Spring Craft Show, Brunswick Rec Center, 3637 Center Road, Brunswick, Ohio 44212
10:00am- 3:00pm
 ~~~~~~~~~~~~~~~~~~~~~~~~~~~~~~~~~~~~~~~~~~~~~~~~~~~~~~~
Sunday, March 13, 2016 - Spring Shopping Extravaganza, Middleburg Heights Community Center,
16000 Bagley Road, Middleburg Heights, Ohio 44130
Time to be announced
 ~~~~~~~~~~~~~~~~~~~~~~~~~~~~~~~~~~~~~~~~~~~~~~~~~~~~~~~
Sunday, March 20, 2016 - Buzzard Days Arts and Craft Show, Hinckley Elementary,
1586 Center Road, Hinckley, Ohio
7:00am- 2:00pm
 ~~~~~~~~~~~~~~~~~~~~~~~~~~~~~~~~~~~~~~~~~~~~~~~~~~~~~~~
We will have pasta, bread, jams, jellies, chocolates, and gift baskets (containing pasta, jellies, chocolates, and recipe cards)
Can not wait to see everyone, and start off a new season!

Saturday, February 20, 2016

Pierogies, Apple Strudel, and Trout!

I spent most of the day today in the kitchen, and I just thought I would share with everyone what I made today and some pictures.  We made three different kinds of pierogies, and some mini personal size apple strudels.  This is the second day that we have spent making pierogies, have to freeze as much as I can and stock up for the summer.  Then once everything was done I cooked up a dinner with our homemade pierogies and trout that we just caught the other day ice fishing.  You can not get much better than that!


Pierogies and  Mini Apple Strudels


Baby Apple Strudels
 

 Potato and Cheddar Cheese Pierogies, Creamed Corn Pierogies, Potato, Garlic Pesto, and Sour Cream Pierogies.
 

Today's dinner, fried pierogies and fresh trout with garlic sauce.

Monday, February 1, 2016

Seed Starting

This is a post that I did in 2010 and I copied it from my old blog.  Just figured since it is going to be seed starting time, I would refresh this post for anyone who many be learning how to start their own seeds.

So here is how I start all my seeds. I pretty much start all my seeds the same way. The only exceptions would be things like vines which I start in pots instead of flats, certain types of seeds that do not need to be covered with dirt, and a few other exceptions.

Below is a list of some things you may need:
Seed Starting Dirt
Warm Water
Popsicle Sticks - for marking
Gloves (if you don't want to get your hands dirty, I don't use gloves for anything but that's just me.)
Container to plant in - I use flats, but you can use just about anything, just poke some holes in the bottom for drainage.
Seeds (of coarse!)
Spray bottle
Sphagnum Moss
Cling Wrap
Tiny hair clips (come in handy for keeping the cling wrap from touching the dirt.)

1. First thing I do is wet my dirt, before planting, with warm water. Just be sure not to get too wet.

2. Once dirt is wet I transfer the dirt into the flat I will be planting in, you can use whatever you wish to plant in some people use styrofoam cups, any kind of used food containers, you can use your imagination. I am not a fan of peat pots or pellets, to me they seem to be difficult to keep from getting too wet and too dry. If you do use peat pots or pellets be sure to tear off some of the pot or netting before planting because you could end up with a problem like this.

3. Then I pat down the dirt.

4. I use popsicle sticks to mark my rows and varieties planted.

5. After I place the popsicle sticks where my rows will be, I use another popsicle stick to make my rows. For seeds that do not need to be covered, I sometimes just scatter the seeds in their area without making rows, and mark the section with a popsicle stick in the dirt as a divider.

6. Place the seeds in the rows.

7. Cover the seeds, by pushing extra dirt on sides of rows over seeds. If you are unsure of how much to cover the seeds it is always better to not over cover the seeds. For most of my seeds I either just barely cover (1/4" on package) or do not cover at all (1/8" on package). If the package states to cover with a 1/8" of dirt I do not cover with dirt at all and just cover with sphagnum moss. If it states to not cover at all I do not cover with dirt or sphagnum moss.

8. Pat down the dirt after covering the seeds.

9. Once I have all my seeds planted, I then cover with a layer of sphagnum moss.

10. Spray with a spray bottle to wet sphagnum moss, spray slowly at first the sphagnum moss will fly everywhere if you don't.

11. I then cover with cling wrap, and use tiny hair clips to keep the cling wrap form touching the dirt. Check every day some seeds will come up within a couple of days. When the seedlings begin to pop up I remove the cling wrap. If some varieties come up and others have not I will sometimes put a plastic dome on the flat for a couple of days to give the unsprouted seeds some more time with extra warmth. You do not want the seedlings to be touching the plastic, so remove once they get to tall.

I place my flats under lights right away. Most seeds do not need light to sprout but the lights give them extra warmth that can greatly speed up the germination process. If the instructions on the package say do not cover the seeds chances are those seeds need light to germinate.

The seeds that I planted in the above flat were cherry tomato seeds. I will be sure to post a picture once they have sprouted and as they grow.


There are so many different methods to start seeds. Everyone has there own way that works best for them. If you are going to be starting seeds of your own, happy seed starting!
Now back to work, planting more seeds.

Real Veggies Farm Facebook Page

 Real Veggies Farm is now on Facebook! Come check out our new Facebook page!  I will be posting updates on what is going on at Real Veggies ...